


In a previous post, we learned how to implement functionality for the Add, Edit, and Delete actions. However, it's important to note that any changes made will be lost once the project is no longer running, as we are using a static variable, OrganizationsData, which is not persisted.
In this post, we will focus on how to persist data using Entity Framework Core (EF Core), an open-source, cross-platform data access technology. EF Core acts as an Object-Relational Mapper (ORM), a technique used to establish a "bridge" between object-oriented programming and, in many cases, relational databases. To delve deeper into the concept of object-relational mapping, you can learn more here.
In Entity Framework, a model is essentially a class with properties that map to database tables and columns. There are two primary methods to create an EF model:
Code First: You write code to define the model and then generate a database.
Database First: Code for models is automatically generated from an existing database.
For a deeper understanding of both approaches, you can explore more details here.
In this post, I will use Code First approach.
Let's create a folder named Entities at the root directory of the Portal project to store our model classes.
Create a class named Tenant in the Entities folder with the following code:
public class Tenant
{
    public int Id { get; set; }
    public Guid Identifier { get; set; }
    public string? Name { get; set; }
}
DbContext
Next, EF Core provides a class called DbContext, where an instance represents a session with the database and serves as the data access layer of an application.
To use the DbContext class, we need to install a NuGet package called Microsoft.EntityFrameworkCore.
There are two ways to install the NuGet package:
NuGet Package Manager: Right-click on Portal project in Visual Studio. Select
Manage NuGet Packages...option.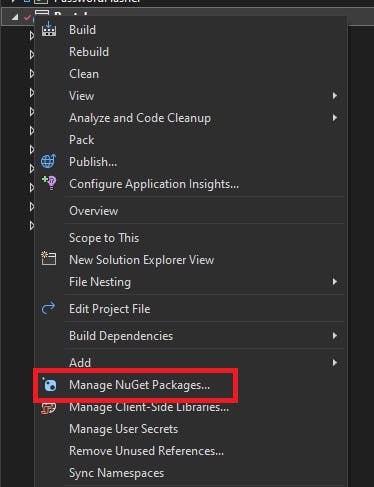
A tab called
NuGet: Portalshould appear. SelectBrowsetab in the content and search forMicrosoft.EntityFrameworkCore, the result should automatically display the package and clickInstallbutton next to it. The package is now installed.
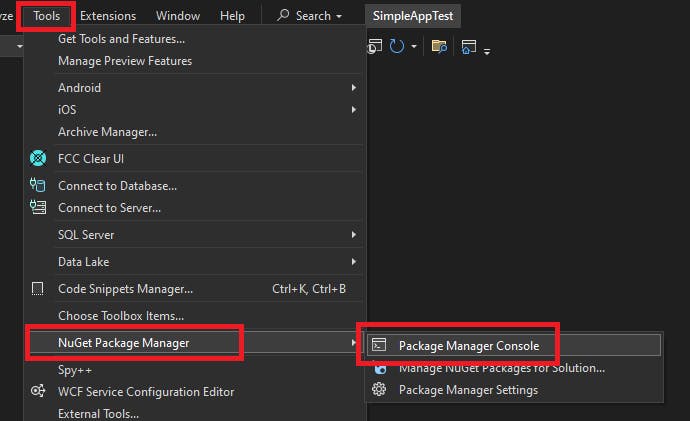
Package Manager Console: In Visual Studio, select Tools > NuGet Package Manager > Package Manager Console.
Package Manager Console will open, make sure
Default projectis Portal.Enter the command below:
Install-Package Microsoft.EntityFrameworkCore
The package is now installed.
With the package installed, let's move on to create a folder named DataAccess at the root directory of Portal project.
Create a class named ApplicationDbContext in the DataAccess folder with the following code:
using Microsoft.EntityFrameworkCore;

namespace Portal.DataAccess;

public class ApplicationDbContext : DbContext
{
    public ApplicationDbContext(DbContextOptions<ApplicationDbContext> options)
        : base(options)
    {
    }
}
The ApplicationDbContext class must expose a public constructor with a DbContextOptions<ApplicationDbContext> parameter. This is essential for configuring the context, including passing the database connection string, which we will explore in more detail later.
The next step is to register the ApplicationDbContext class with the ASP.NET Core built-in service container IServiceProvider. IServiceProvider enables us to perform dependency injection which is a popular design pattern to help create a loosely coupled application. For further information on dependency injection in ASP.NET Core, you can learn more here.
Connection String
To register ApplicationDbContext class, we need to provide a database connection string to our DbContext.
For development purposes, I will use LocalDB database engine as mentioned in my previous post. By default, LocalDB creates .mdf files in the C:/Users/<user> directory.
Thus, our connection string will look like the following:
Data Source=(localdb)\\mssqllocaldb;Initial Catalog=SAT-Auth;Integrated Security=True;MultipleActiveResultSets=True
For now, I will set the database name as SAT-Auth. You might be wondering why Auth is included; there's a reason for this, which I'll explain in a future post. Let's move on.
Now, let's save this connection string in the appsettings.json file.
{
  "Logging": {
    "LogLevel": {
      "Default": "Information",
      "Microsoft.AspNetCore": "Warning"
    }
  },
  "AllowedHosts": "*",
  "User": {
    "Username": "admin",
    "Password": "1BA4C23E864692C52390C1430B6EEBA1B8B53A71067E6D5438CCA9A593B9137153E68517DC9B66F8289FA3077F3063341AEBD7E97C808F2B7F95EFCC31FCB6EA", // "123Password"
    "Salt": "2EAB59E8D1BB4A15F72403914A397A12B03A319C6CD22C1BFED0C5C4EEDE4B1AB1EC353FDB3624F6AF65D792E25EB92C414C3BD64C055B5FFD325278E7B441DD"
  },
  "ConnectionStrings": {
    "DefaultConnection": "Data Source=(localdb)\\mssqllocaldb;Initial Catalog=SAT-Auth;Integrated Security=True;MultipleActiveResultSets=True"
  }
}
Note that the connection string is saved under ConnectionStrings:DefaultConnection section in appsettings.json file. Learn more how to access Connection Strings here.
With that setup, we are now ready to register ApplicationDbContext class.
First, we need to install a NuGet package named Microsoft.EntityFrameworkCore.SqlServer to enable us to access LocalDB database for Entity Framework Core.
In Package Manager Console, enter the command below:
Install-Package Microsoft.EntityFrameworkCore.SqlServer
In Extensions\WebApplicationBuilderExtensions.cs file, add the following line in ConfigureServices method:
builder.Services.AddDbContext<ApplicationDbContext>(options =>
{
    options.UseSqlServer(builder.Configuration.GetConnectionString("DefaultConnection"));
});
This code sets up the ApplicationDbContext to read the connection string named DefaultConnection from appsettings.json file. Note that it uses an internal ASP.NET Core configuration system to read the connection string.
Next, we need to let ApplicationDbContext to manage our data model Tenant in Entities folder. For this purpose, we use DbSet. This abstract class DbSet helps to query and save instances of entity (Tenant). You can learn more about the definition of DbSet here.
Create Data Model
We also need to configure the data model once ApplicationDbContext is initialized by overriding a method named OnModelCreating.
Update DataAccess\ApplicationDbContext.cs with the following code:
using Microsoft.EntityFrameworkCore;
using Portal.Entities;

namespace Portal.DataAccess;

public class ApplicationDbContext : DbContext
{
    public ApplicationDbContext(DbContextOptions<ApplicationDbContext> options)
        : base(options)
    {
    }

    public DbSet<Tenant> Tenants { get; set; }

    protected override void OnModelCreating(ModelBuilder modelBuilder)
    {
        modelBuilder.Entity<Tenant>(entity =>
        {
            entity.ToTable("Tenants");
            entity.HasKey(e => e.Id);
            entity.Property(e => e.Id).ValueGeneratedOnAdd();
            entity.Property(e => e.Name).IsRequired().HasMaxLength(100);
            entity.Property(e => e.Identifier).IsRequired();
        });
    }
}
The code provided above accomplishes the following:
It creates a
DbSet<Tenant>property for theTenantentity.It defines the configuration for the
Tenantentity in the database schema, where:The table is named
Tenants.The primary key is
Idand it is automatically generated by the database.Both the
NameandIdentifierfields are marked as required.The
Namefield has a maximum length of 100 characters.
Dependency Injection
Next, let's add the code below in ConfigurePipeline method in Extensions\WebApplicationBuilderExtensions.cs file to auto-create a database based on the configuration that we put in ApplicationDbContext class.
using (var scope = app.Services.CreateScope())
{
    var services = scope.ServiceProvider;
    var context = services.GetRequiredService<ApplicationDbContext>();
    context.Database.EnsureCreated();
}
The final content of Extensions\WebApplicationBuilderExtensions.cs file as shown below:
using Microsoft.AspNetCore.Authentication.Cookies;
using Microsoft.EntityFrameworkCore;
using Portal.DataAccess;

namespace Portal.Extensions;

public static class WebApplicationBuilderExtensions
{
    public static WebApplication ConfigureServices(this WebApplicationBuilder builder)
    {
        builder.Services.AddDbContext<ApplicationDbContext>(options =>
        {
            options.UseSqlServer(builder.Configuration.GetConnectionString("DefaultConnection"));
        });

        builder.Services.AddAuthentication(CookieAuthenticationDefaults.AuthenticationScheme)
                        .AddCookie();

        builder.Services.AddAuthorization();

        builder.Services.AddRazorPages();

        return builder.Build();
    }

    public static WebApplication ConfigurePipeline(this WebApplication app)
    {
        // Configure the HTTP request pipeline.
        if (!app.Environment.IsDevelopment())
        {
            app.UseExceptionHandler("/Error");
            // The default HSTS value is 30 days. You may want to change this for production scenarios, see https://aka.ms/aspnetcore-hsts.
            app.UseHsts();
        }

        using (var scope = app.Services.CreateScope())
        {
            var services = scope.ServiceProvider;
            var context = services.GetRequiredService<ApplicationDbContext>();
            context.Database.EnsureCreated();
        }

        app.UseHttpsRedirection();
        app.UseStaticFiles();

        app.UseRouting();

        app.UseAuthentication();
        app.UseAuthorization();

        app.MapRazorPages()
           .RequireAuthorization();

        return app;
    }
}
The EnsureCreated method creates an empty database. But it is not able to migrate changes to an existing database. Later in this post, I will show how to migrate changes to an existing database as most of the time we want to keep existing data in the database.
Let's test the code to see if database could be created.
Press F5 and run the project.
Notice that in debug console, the application issued a SQL command CREATE DATABASE [SAT-Auth]. It also ran a series of commands including creating table named Tenants.

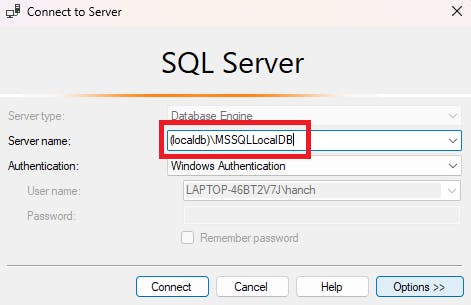
To confirm that the database was created successfully, let's open a tool named Microsoft SQL Server Management Studio. This tool was mentioned in my previous post as one of the tools we are going to use.
Depending on your LocalDB installation, your server name might be different from mine. But generally, the default server name would be (localdb)\MSSQLLocalDB.
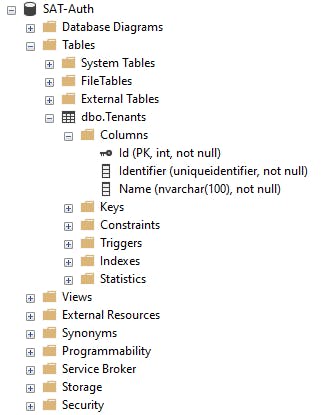
Once you are connected to the database server, locate a database named SAT-Auth in Object Explorer pane. You should be able to see a table named Tenants was created successfully too.
Razor Page Models
The next thing we need to do is to modify code for IndexModel, AddModel, EditModel and DeleteModel classes to enable data access using EF Core.
Update the content for Tenants\Index.cshtml.cs as shown below:
using Microsoft.AspNetCore.Mvc.RazorPages;
using Microsoft.EntityFrameworkCore;
using Portal.DataAccess;
using Portal.Models;

namespace Portal.Pages.Tenants;

public class IndexModel : PageModel
{
    private readonly ApplicationDbContext _context;

    public List<OrganizationViewModel> Organizations { get; set; } = new();

    public IndexModel(ApplicationDbContext context)
    {
        _context = context!;
    }

    public async Task OnGetAsync()
    {
        Organizations = await _context.Tenants.Select(o => new OrganizationViewModel
        {
            Id = o.Id,
            Identifier = o.Identifier,
            Name = o.Name
        })
        .ToListAsync();
    }
}
This code above injects an instance of ApplicationDbContext through its constructor and assign it to a private variable named _context. The OnGetAsync method retrieves data from _context.Tenants and maps it to OrganizationViewModel objects.
Update the content for Tenants\Add.cshtml.cs as shown below:
using Microsoft.AspNetCore.Mvc;
using Microsoft.AspNetCore.Mvc.RazorPages;
using Portal.DataAccess;
using Portal.Models;

namespace Portal.Pages.Tenants;

public class AddModel : PageModel
{
    private readonly ApplicationDbContext _context;

    [BindProperty]
    public AddOrganizationViewModel Organization { get; set; } = new();

    public AddModel(ApplicationDbContext context)
    {
        _context = context;
    }

    public IActionResult OnPost()
    {
        if (!ModelState.IsValid)
        {
            return Page();
        }

        _context.Tenants.Add(new Entities.Tenant
        {
            Identifier = Guid.NewGuid(),
            Name = Organization.Name,
        });
        _context.SaveChanges();

        TempData["Message"] = $"Organization {Organization.Name} added successfully.";

        return RedirectToPage("Index");
    }
}
Similar to IndexModel class, the code above injects an instance of ApplicationDbContext through its constructor and assign it to a private variable named _context. To add a new tenant, it invokes _context.Tenants.Add method and _context.SaveChanges to persist the data.
Update the content for Tenants\Edit.cshtml.cs as shown below:
using Microsoft.AspNetCore.Mvc;
using Microsoft.AspNetCore.Mvc.RazorPages;
using Microsoft.EntityFrameworkCore;
using Portal.DataAccess;
using Portal.Models;

namespace Portal.Pages.Tenants;

public class EditModel : PageModel
{
    private readonly ApplicationDbContext _context;

    [BindProperty(SupportsGet = true)]
    public int Id { get; set; }

    [BindProperty]
    public EditOrganizationViewModel Organization { get; set; } = new();

    public EditModel(ApplicationDbContext context)
    {
        _context = context;
    }

    public void OnGet()
    {
        var organization = _context.Tenants.Find(Id);

        if (organization is null)
        {
            TempData["Message"] = "Organization not found!";

            RedirectToPage("Index");
        }

        Organization = new EditOrganizationViewModel
        {
            Id = organization!.Id,
            Name = organization.Name
        };
    }

    public IActionResult OnPost()
    {
        if (!ModelState.IsValid)
        {
            return Page();
        }

        var organization = _context.Tenants.Find(Id);

        if (organization is null)
        {
            TempData["Message"] = "Organization not found!";

            RedirectToPage("Index");
        }

        organization!.Name = Organization.Name!;

        _context.Entry(organization).State = EntityState.Modified;
        _context.SaveChanges();

        TempData["Message"] = $"Organization {organization.Name} updated successfully.";

        return RedirectToPage("Index");
    }
}
After updating properties for the tenant, it sets the entity state to EntityState.Modified so that UPDATE SQL statement will be issued. Learn more about other possible states here. Lastly, it invokes _context.SaveChanges() method to persist it in the database.
Update the content for Tenants\Delete.cshtml.cs as shown below:
using Microsoft.AspNetCore.Mvc;
using Microsoft.AspNetCore.Mvc.RazorPages;
using Portal.DataAccess;

namespace Portal.Pages.Tenants;

public class DeleteModel : PageModel
{
    private readonly ApplicationDbContext _context;

    [BindProperty(SupportsGet = true)]
    public int Id { get; set; }

    public DeleteModel(ApplicationDbContext context)
    {
        _context = context;
    }

    public IActionResult OnGetDelete()
    {
        var tenant = _context.Tenants.Find(Id);

        if (tenant is null)
            TempData["Message"] = "Organization not found!";

        _context.Tenants.Remove(tenant!);
        _context.SaveChanges();

        TempData["Message"] = "Organization deleted successfully.";

        return RedirectToPage("Index");
    }
}
To delete a tenant from the database, the code invokes _context.Tenants.Remove method and _context.SaveChanges method to persist the deletion in the database.
Test The App
With those changes, let's press F5 and run the project.
Initially, the table on Index page will be empty.
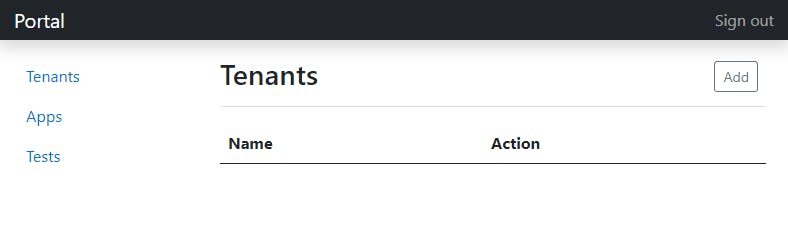
Click Add button to add a new tenant.
Click Edit button to change the name of the tenant.
Click Delete button to delete the tenant from the database.
Now, your application should be able to query and modify tenant data in the database.
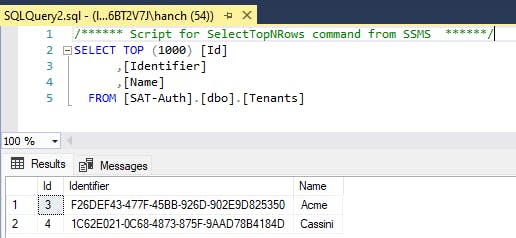
You can also open up the tool named Microsoft SQL Server Management Studio and see the data in Tenants table.
For example, I have added 2 new tenants and wish to check it in the Tenants table. The easiest way is to right-click on the table as shown below:
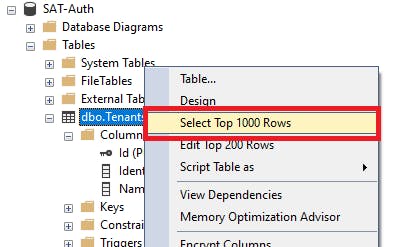
Select Select Top 1000 Rows option, it will auto-generate SELECT statement for you to retrieve data from Tenants table as shown below:
Troubleshoot
You may have encountered a problem while trying to launch the project in Visual Studio as shown below:

When we look at MS Visual Studio Debug Console, we may have the following messages as below:

It means that the application needs to have a certain framework version to launch the project. To fix this issue, just browse the given link after To install missing framework, download:
On the page, make sure we select the correct architecture (x64, x86 or arm64). In the screenshot, it requires version '6.0.24' (x64).

Click the Download x64 button, a page will show below and the download should happen automatically.
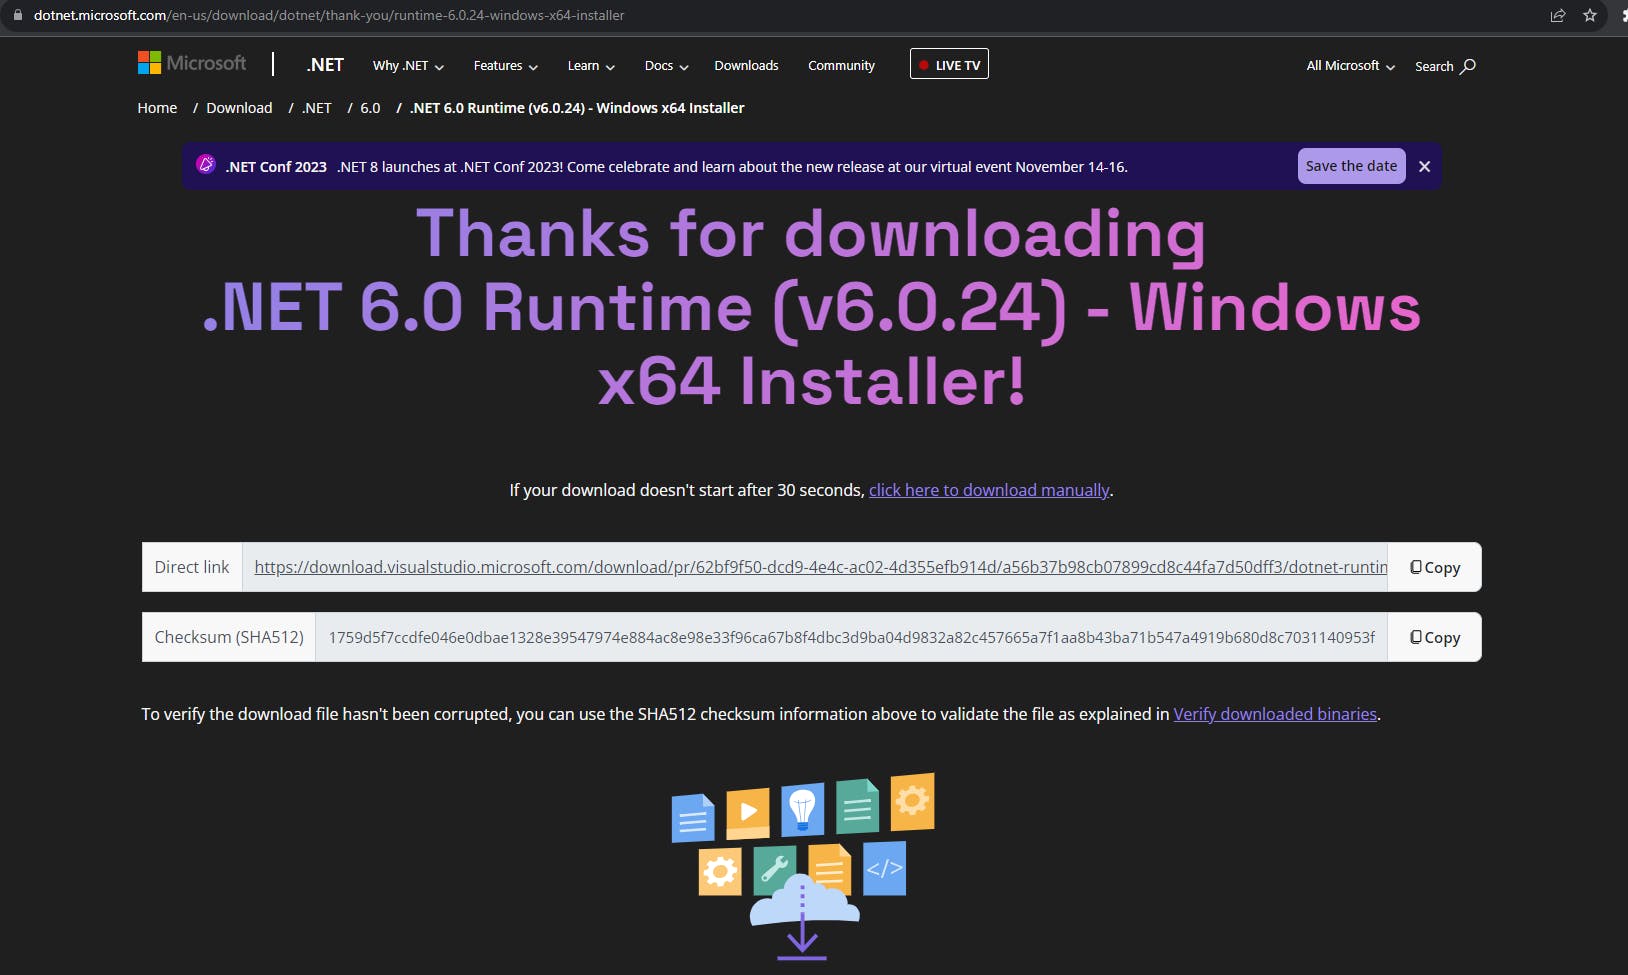
Run the downloaded .exe file which has the filename dotnet-runtime-6.0.24-win-x64.exe. A window installer wizard should appear like below:

Click Install button to begin installation.
After installation is completed, close your Visual Studio.
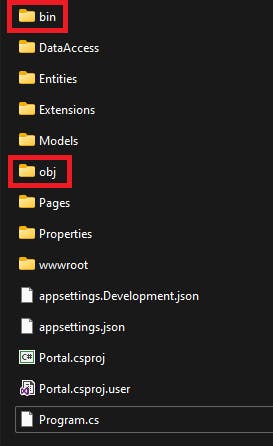
Remove both bin and obj folders from your project directory.
Open your project in Visual Studio and you should be able to launch the application.
Conclusion
In this post, we learn how to persist data by integrating Entity Framework Core into our project. To work with EF Core, DbContext class was introduced serving as the data access layer. We use the connection string which is configured in appsettings.json file. We also cover how to handle data access in various Razor Page models, including IndexModel, AddModel, EditModel, and DeleteModel. With this step, our project is now a database-driven web application.